Aquarium Calcium/Hardness 101 Spotlight for Fresh & Saltwater
Calcium (Ca) is an essential element in an aquarium and a vital element for a reef tank. Just like people, calcium helps keep our bone structure healthy. Calcium is used in a similar process in an aquarium and used for shells, exoskeleton, or skeletal structures. While in a freshwater aquarium, calcium is rarely tested due to most species needs, in saltwater aquariums, more importantly, a reef tank, its crucial element to keep up with and keep consistent. Natural water sources like rivers, lakes, and oceans have calcium due to the natural erosion of stones. Stones like limestone, marble, calcite, dolomite, gypsum, fluorite, and apatite release calcium into the water.
How Does Calcium Affect Water Hardness
Calcium is also one of the elements in water hardness. When looking at total hardness, water hardness is composed of both calcium and magnesium (“total hardness”) elements found in the water.
Freshwater Aquarium Calcium Hardness Needs
In freshwater aquariums, several plants and most invertebrate species (crabs, crayfish, and shrimp) will benefit from calcium elements in the water. It can help in plant cell development and to help strengthen and grow invertebrates exoskeleton or a shell.
Ideal Calcium Hardness Levels for a Freshwater Aquarium
Maintaining calcium levels in a freshwater aquarium is a bit more challenging to maintain due to water chemistry. For the most part, freshwater aquariums use tap water. Tap water has natural minerals, and as long as the source water has a calcium hardness of 70-90 mg/L, then your natural water changes performed at least once every two weeks should take care of your calcium needs. If you use reverse osmosis, water chances are that you enrich the water with added nutrients, which should also take care of your calcium needs as long as you are performing regular water changes.
Suggested water changes should be at least 25% every two weeks
If the source water used during water changes does not have sufficient hardness or if the calcium is being depleted too quickly, then you may need to use additives to maintain your calcium levels.
High Calcium Hardness Levels in a Freshwater Aquarium
If your aquariums calcium concentration is too high, you will start to see scaling occur on the water’s edge, and you may need to replace or clean your filters more frequently.
Many freshwater species can survive outside their ideal calcium range. More importantly, what can harm species are sudden changes in water chemistry, this is more important to avoid versus concerns of being outside of their ideal range. However, if you are outside the ideal levels when introducing new species, you will need to slowly acclimate them to prevent them from experiencing a sudden change that can stress and kill aquarium species.
Saltwater Aquarium Calcium Needs
In saltwater aquariums, plants, invertebrates (crabs, crayfish, and shrimp) and corals will benefit from calcium elements in the water. While all of these will benefit from calcium present in the water, corals, especially, most large polyp corals and all stony corals need calcium to stay healthy and to grow.
Most Large Polyp Stony (LPS) and Small Polyp Stony (SPS) skeleton structure are made from calcium that they absorb from the water. Keeping your calcium levels at a healthy level and, more importantly, at a constant level will help promote coral growth.
Ideal Calcium Levels for Saltwater Aquarium
Fish Only with Live Rock (FOWLR) aquariums are more resilient and can adapt to many different levels of calcium. Keep in mind that invertebrates need calcium and if you want to grow coralline algae on your live rock as well. The oceans around the world have a calcium range between 380-420 ppm (parts per million). Fish show few problems when kept at levels slightly higher or lower than average.
In a FOWLR tank, you should test your calcium levels at least once a month.
Ideal Calcium Levels for Saltwater Reef Aquarium
The oceans around the world have a calcium range between 380-420 ppm (parts per million). For this reason, in a home reef tank, we try to maintain similar calcium levels. Most people in the hobby aim for a range between 400 – 425 ppm.
When I order corals online, I like to test the water the corals come in, not because I think there is something wrong with it but because I am interested in their water parameters. I figured who else would have ideal water conditions than someone who makes a living by growing and selling corals. Major vendors tend to keep elevated calcium levels, which I can only imagine it is due to them seeing success and elevated growth rates. With ranges as high as 480 to 490 ppm, and I have also seen calcium level as high as 510 ppm.
Elevated calcium levels have been known to encourage faster growth in LPS and SPS corals. The more important thing to keep in mind is consistency, bumping your calcium levels high, but not being able to maintain the levels consistent does not help. Consistency is key to coral health and growth, so maintaining a consistent 370 ppm will display healthy corals with a slower growth rate then if your calcium levels bouncing from 380 to 480 ppm.
Calcium should be tested regularly in a reef tank. As your corals grow, the amount of calcium that they adsorb will also increase. Therefore the amount of calcium you will need to supplement will also increase. By testing regularly, you can see when your calcium levels start to decrease and make the necessary adjustments. Aquarium alkalinity is also relevant and should be tested when you test your calcium levels. If you are having trouble maintaining a proper calcium and alkalinity level, then you should check your magnesium.
In a Reef Tank, you should test your calcium levels once a week.
High Calcium Levels in a Saltwater Aquarium
If your calcium levels get too high, it will cause your alkalinity to drop. If your alkalinity drops, then it will cause your tank parameters to swing. Causing instability in the aquarium that can cause species to get stressed out and even possibly die.
Saltwater species are quite sensitive as to living outside of their ideal conditions. High levels of calcium affect all of the other parameters and stress out fish, invertebrates, and corals. Signs of stress can be seen in different ways for different species. Some symptoms can range from lethargy to erratic swimming or slower growth levels. In extreme cases, too much calcium can kill aquarium species.
How to Determine How Much Calcium is Needed
To determine the amount of calcium your aquarium needs daily will require you to do multiple calcium test. You may need to run a calcium test, try to run the test around the same time frame. Each day may require you to adjust the amount of calcium you are adding to your tank till eventually it’s not needed. Once you feel like you are adding the correct amount of calcium each day, then you should go back to checking your calcium levels weekly to determine that you are maintaining the proper levels.
How Often Should I Replenish Depleted Calcium
Consistency in an aquarium will produce a thriving environment. When it comes to your calcium level in a freshwater tank, you should check it once a month and make the needed adjustments. In a reef tank, keeping a consistent calcium level is vital. You want to add the depleted calcium as quickly as possible to maintain constant calcium levels. This could mean making adjustments weekly, daily, or multiple times a day.
Depending on the calcium consumption rate of your aquarium, it will help you determine what you should use to replenish it. Each solution is designed for different consumption rates and can be partnered with other devices to help you automate, adding them to your aquarium.
Ways to Replenish Calcium?
Calcium can be replenished easily through many different ways in a saltwater aquarium. Caution should be taken when making big swings in calcium. If you need to make a significant change, it is best to do it over a long period to across multiple days. A big swing in calcium can cause a drop in alkalinity and stress species out and show adverse effects or even possible death.
- Kalkwasser – Kalkwasser is German and translates to limewater in English. It can buffer Alkalinity, Calcium, and pH. It has to be dosed precisely and slowly to prevent a significant swing in pH.
- Calcium Chloride – It can be added directly to your aquarium in a high flow area, but in most cases, it is mixed with RO water and considered one part of a two-part solution, which makes it easier to dose. It also allows the use of dosing tools to automate the daily task.
- Water Changes – The process of removing water from your aquarium and replacing it with an equal amount of water. Water changes can replenish lost elements in your water. In a saltwater aquarium, most salts have elevated levels of calcium to help buffer your water parameters. Water changes are ideal if the water change is enough to buffer the drop in calcium since your last water change.
- Calcium Reactor – A calcium reactor dissolves carbonate media (or dead stony corals) in a chamber and slowly introduced back into the aquarium. How quickly it is reintroduced to the tank will vary depending on the calcium absorption rate. They can take a little bit of tinkering to get them set correctly, but once they are established, they are generally good for a while. They can replenish alkalinity, calcium, and magnesium to your aquarium.
If your aquarium has a low calcium demand, then simply doing water changes can help keep your calcium in check while also adding other depleted and needed elements. All while helping you reduce your aquarium nitrate and phosphate levels to help prevent algae outbreaks.
In a more established LPS or SPS dominated reef tank, the amount of calcium consumed in most cases is too high to replenish through water changes. They require additional sources to replace adsorbed calcium.
How Can I Test Alkalinity in my Aquarium?
Many different test kits allow you to test your alkalinity in an aquarium in a few different ways. We go over the most common solutions to the most advanced solutions to keep track of your alkalinity levels. Some test gives you a range to provide you with an idea if you have a problem while others are more extract digital value of your alkalinity. The digital reading is great to see exactly how much alkalinity is being consumed on a daily bases. Here are the different alkalinity test kits available that you can buy.
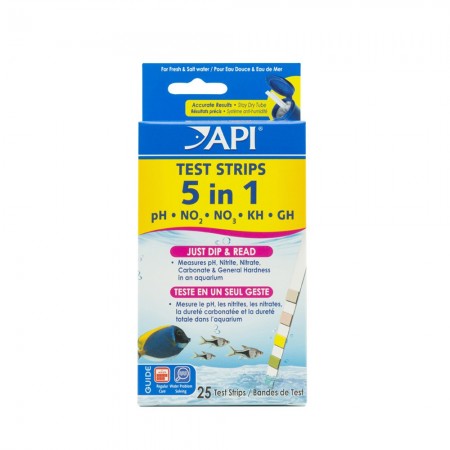
API Test Strips |
|
 |
Not only is this the easiest option, but it is also one of the most affordable options to test calcium. Just open the container, pull out a dipstick, and dip it in your water. Wait a period of time and compare the color on the calcium value to the color chart. Cost about $10 |
|
Pros: Super Simple, inexpensive, easy to test, test 5 parameters at the same time Cons: You have to compare a color chart to determine the value, and it can be open to interpretation, will provide you with a range for the value. |
|
CHECK PRICE |
|
____________________________________________________________________
API Calcium Ca Test Kit |
|
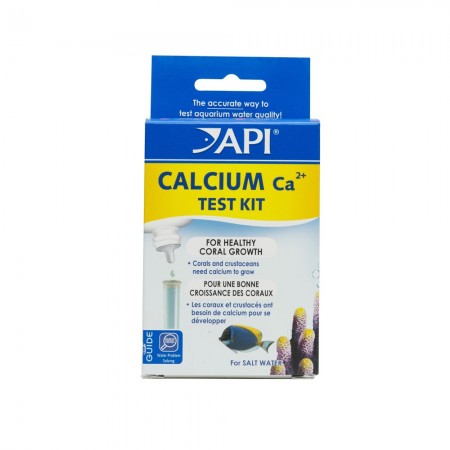 |
Super simple to run a test, I always have one of these test kits laying around. Just grab a sample of water then add ten drops of reagent#1 and stir, then keep adding drops of reagent #2 and stirring/shaking the water sample until the water changes from pink to a blue color. Each drop is equal to 20 ppm. Cost about $12 |
|
Pros: Very inexpensive, you can quickly run a test, a quick idea of your calcium value Cons: The value is not the exact value; it can range +/- 15 ppm. |
|
CHECK PRICE |
|
____________________________________________________________________
Aquaforest Calcium Ca Test Pro Test Kit |
|
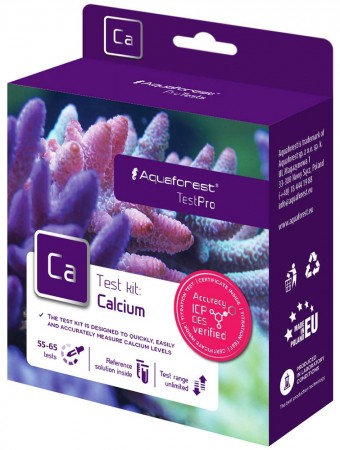 |
Aquaforest is well known in the industry and know for there labs grade products. Get a sample of your water, place five drops of reagent A into your sample, and then share to stir well. Add one level spoon of reagent B then shake for twenty seconds to stir well. Place the syringe into the titrant and slowly draw up the plunger until the plunger reaches the 1ml mark. Then you slowly add the titrant to your water sample until the water sample goes from pink to blue. Once it’s blue, look at the syringe and then the chart to determine your value. Cost about $18 |
|
Pros: Trusted brand, great price, you can quickly run a test to get an idea of your calcium value Cons: The value is not the exact value; it can range +/- 15 ppm. |
|
CHECK PRICE |
|
____________________________________________________________________
Salifer Calcium Ca Test Kit |
|
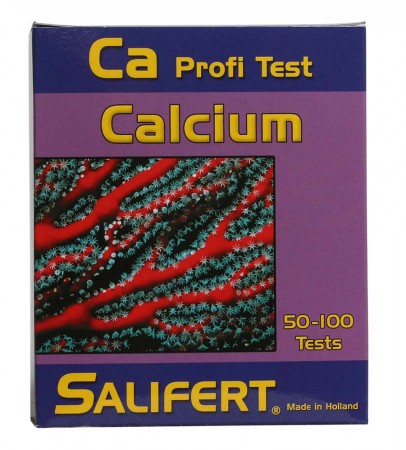 |
Super simple to run a test and the Salifer test kits are well known in the hobby. Get a sample of your water, place five drops of reagent A into your sample, and then share to stir well. Add one level spoon of reagent B then shake for twenty seconds to stir well. Place the syringe into the titrant and slowly draw up the plunger until the plunger reaches the 1ml mark. Then you slowly add the titrant to your water sample until the water sample goes from pink to blue. Once it’s blue, look at the syringe and then the chart to determine your value. Cost about $19 |
|
Pros: Trusted brand, you can quickly run a test to get an idea of your calcium value Cons: The value is not the exact value; it can range +/- 15 ppm. |
|
CHECK PRICE |
|
____________________________________________________________________
Giesemann Professional Calcium Ca Test Kit |
|
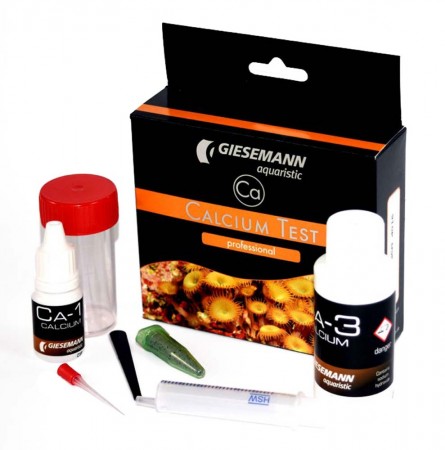 |
Super simple to run a test and the Salifer test kits are well known in the hobby. Get a sample of your water, place five drops of reagent A into your sample, and then share to stir well. Add one level spoon of reagent B then shake for twenty seconds to stir well. Place the syringe into the titrant and slowly draw up the plunger until the plunger reaches the 1ml mark. Then you slowly add the titrant to your water sample until the water sample goes from pink to blue. Once it’s blue, look at the syringe and then the chart to determine your value. Cost about $18 |
|
Pros: Trusted brand, you can quickly run a test to get an idea of your calcium value Cons: The value is not the exact value; it can range +/- 15 ppm. |
|
CHECK PRICE |
|
____________________________________________________________________
Red Sea Calcium Pro Test Kit |
|
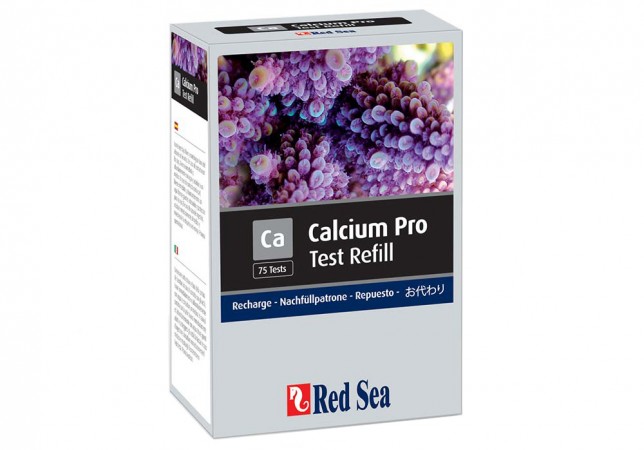 |
A well-designed test kit that makes it easy to perform most of the test using one hand. Get a sample of your water, place five drops of reagent A into your sample, and then share to stir well. Add one level spoon of reagent B then shake for twenty seconds to stir well. Place the syringe into the titrant and slowly draw up the plunger until the plunger reaches the 1ml mark. Then you slowly add the titrant to your water sample until the water sample goes from pink to blue. Once it’s blue, look at the syringe and then the chart to determine your value. Cost about $35 |
|
Pros: Trusted brand, you can quickly run a test to get an idea of your calcium value Cons: If you are not a fan of the design on the test kit, it is just an extra cost, the value is not the exact value; it can range +/- 15 ppm. |
|
CHECK PRICE |
|
____________________________________________________________________
ATI Lab Test Kit ICP-OES Complete Water Analysis |
|
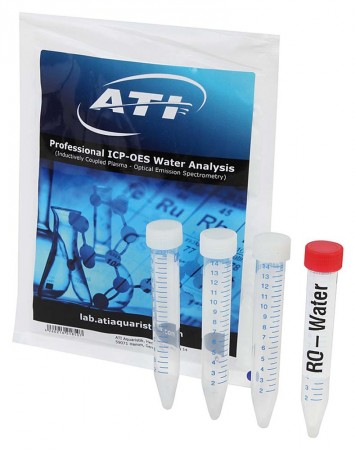
|
The ATI ICP Test is a Lab Grade test that tests many water parameters, including calcium. The process is simple, create a free account, and then register your test kit. Then fill the three vile’s with tank water and get a sample of your RO water with the vile with the red cap. Return all of the vile’s using the prepaid envelope. The test takes typically one to two weeks; once complete, you will receive an email letting you know that the results are ready. ATI Labs analyzes about 42 parameters the most out of all ICP providers. Cost about $45 |
|
Pros: Super Simple, Lab grade results, Actual values for over 40 parameters. Cons: You have to wait for one to two weeks to get the results, the overall cost of a single test can be considered pricey |
|
CHECK PRICE |
|
____________________________________________________________________
Hanna Instruments Checker Marine Calcium Colorimeter |
|
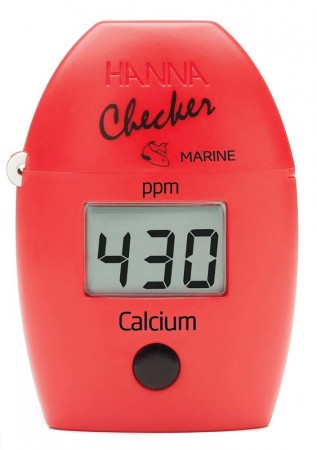 |
A great way to get an accurate digital reading of your calcium brought to you by Hanna Instruments, who provides professional solutions as well. Just grab a sample of water, add the reagent to the water sample, place it in the Colorimeter, and press the button. It will then show you your calcium value. Once you’re done, make sure to clean the container, but make sure that you do not scratch the glass as it can affect the way it reads. Cost about $50 |
|
Pros: Get an exact digital reading, Trusted brand Cons: You have to keep the test vile clean, scratches, and even fingerprints can cause a false reading. |
|
CHECK PRICE |
|
___________________________________________________________________________
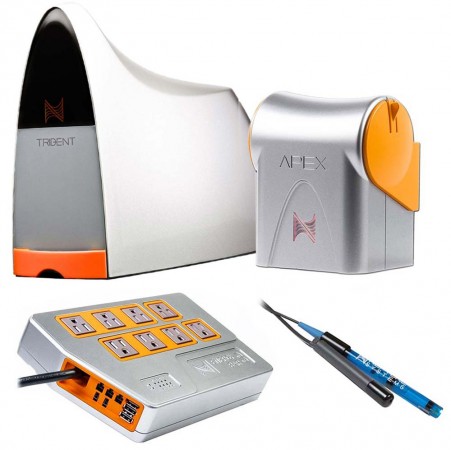
Trident Marine Aquarium Water Analyzer |
|
|
The Trident made by Neptune Systems who is known for the Apex Aquarium Controller came out with an automated tester that can test the core parameters for a reef aquarium, which are Alkalinity, Calcium, and Magnesium. It does not work independently. It connects to your Apex Controller. Not only will the Trident measure the core components, but it more accessories it can take action on the results and automatedly dose to trigger a water change. The Trident alone cost about $599.99 |
|
Pros: Get an exact digital reading, automatically logs results so you can see a trend, well-known brand, automate an action based off of a result Cons: Costly setup that ads up quickly costing over $1,000 for the Trident and the Apex controller, reagents will cost about $17 a month |
|
CHECK PRICE |
|
_________________________________________________________________
Regardless of how you test your calcium levels, it’s essential to keep a log of your water parameters. Tank Facts allows you to create a free account and keep a digital water log for all of your tanks. Just click on My Tank(s), add one or more tanks to start logging your water parameters today.